# MNMP
MNMP,指的是:Mac + Nginx + MySQL + PHP。
在Mac系统中,我们推荐使用:brew 安装!如安装过程中遇到问题,请参考 brew
# 一、Nginx
# 1.1 安装 nginx
常用命令
# brew 安装
brew install nginx

# 启动nginx(默认 localhost:8080端口)
sudo nginx

# 重新加载|重启|退出
sudo nginx -s reload|reopen|quit
安装
# 查询 nginx
brew search nginx

# 安装 nginx
brew install nginx

# 安装过程中,会出现如下信息:
==> Downloading https://mirrors.ustc.edu.cn/homebrew-bottles/nginx-1.21.1.catalina.bottle.tar.gz
######################################################################## 100.0%
==> Pouring nginx-1.21.1.catalina.bottle.tar.gz
==> Caveats
Docroot is: /usr/local/var/www

The default port has been set in /usr/local/etc/nginx/nginx.conf to 8080 so that
nginx can run without sudo.

nginx will load all files in /usr/local/etc/nginx/servers/.

To have launchd start nginx now and restart at login:
  brew services start nginx
Or, if you don't want/need a background service you can just run:
  nginx
==> Summary
🍺  /usr/local/Cellar/nginx/1.21.1: 25 files, 2.2MB
# 1.2 管理nginx
通过的上面安装信息,可以获取以下信息:
默认端口号:
8080
The default port has been set in /usr/local/etc/nginx/nginx.conf to 8080 so that nginx can run without sudo.我们可以手动修改端口号为
8888:server { # 端口号 listen 8888; # server_name server_name localhost; # ... }加载所有nginx配置:
/usr/local/etc/nginx/servers/启动nginx
brew services start nginx后台服务启动nginx
nginx
# 二、Mysql
Mac地址通过
brew安装
# 2.1 查询MySql版本
# 查询
brew search mysql

# 安装指定版本
brew install mysql@5.7

# 安装成功后提示
We've installed your MySQL database without a root password. To secure it run:
    mysql_secure_installation

MySQL is configured to only allow connections from localhost by default

To connect run:
    mysql -uroot

mysql@5.7 is keg-only, which means it was not symlinked into /usr/local,
because this is an alternate version of another formula.

If you need to have mysql@5.7 first in your PATH, run:
  echo 'export PATH="/usr/local/opt/mysql@5.7/bin:$PATH"' >> ~/.zshrc

For compilers to find mysql@5.7 you may need to set:
  export LDFLAGS="-L/usr/local/opt/mysql@5.7/lib"
  export CPPFLAGS="-I/usr/local/opt/mysql@5.7/include"


To have launchd start mysql@5.7 now and restart at login:
  brew services start mysql@5.7
Or, if you don't want/need a background service you can just run:
  /usr/local/opt/mysql@5.7/bin/mysql.server start
# 2.2 命令
mysql.server {start|stop|restart|reload|force-reload|status}
- 启动MySQL服务:
mysql.server start - 设置密码:
mysql_secure_installation - 连接MySQL:
mysql -uroot
# 三、PHP
MacOS自带了 Apache 和 PHP
- 查看PHP版本:
php -v 或 php -verseion
# 3.1 安装 PHP
# 查询php
brew search php

# 安装指定版本php
brew install php@7.4

# 安装成功,提示信息
To enable PHP in Apache add the following to httpd.conf and restart Apache:
    LoadModule php7_module /usr/local/opt/php@7.4/lib/httpd/modules/libphp7.so

    <FilesMatch \.php$>
        SetHandler application/x-httpd-php
    </FilesMatch>

Finally, check DirectoryIndex includes index.php
    DirectoryIndex index.php index.html

The php.ini and php-fpm.ini file can be found in:
    /usr/local/etc/php/7.4/

php@7.4 is keg-only, which means it was not symlinked into /usr/local,
because this is an alternate version of another formula.

If you need to have php@7.4 first in your PATH, run:
  echo 'export PATH="/usr/local/opt/php@7.4/bin:$PATH"' >> ~/.zshrc
  echo 'export PATH="/usr/local/opt/php@7.4/sbin:$PATH"' >> ~/.zshrc

For compilers to find php@7.4 you may need to set:
  export LDFLAGS="-L/usr/local/opt/php@7.4/lib"
  export CPPFLAGS="-I/usr/local/opt/php@7.4/include"


To start php@7.4:
  brew services start php@7.4
Or, if you don't want/need a background service you can just run:
  /usr/local/opt/php@7.4/sbin/php-fpm --nodaemonize
==> git
The Tcl/Tk GUIs (e.g. gitk, git-gui) are now in the `git-gui` formula.

zsh completions and functions have been installed to:
  /usr/local/share/zsh/site-functions

Emacs Lisp files have been installed to:
  /usr/local/share/emacs/site-lisp/git
# 3.2 管理PHP
- 启动:
brew services start php@7.4
# 3.3 composer
curl -sS https://getcomposer.org/installer | php

sudo mv composer.phar /usr/local/bin/composer
# 3.4 TP6.0
- php
$ php think make:command Hello hello

# 报错
 require(vendor/autoload.php): failed to open stream
What you're missing is running composer install, which will import your packages and create the vendor folder, along with the autoload script.
# 四、Apache
启动、关闭、重启Apache命令如下:
- 开启:
sudo apachectl start - 停止:
sudo apachectl stop - 重启:
sudo apachectl restart - 查看Apache版本:
httpd -v 或 sudo apachectl -v - 查找Apache执行文件:
which apachectl
# 实战
# 一、开启MySQL
# 启动MySQL
$ mysql.server start

# 登录mysql,输入user和password
$ mysql -u root -p

# 查看所有数据库
$ show databases;

# 创建数据库
$ create database plc_threetowns;
创建数据库或数据表,建议使用 SQLPro Studio进行可视化管理,效率更高哦!
# 二、开启nginx
# 1. 端口号修改
当您通过命令行:nginx, 来启动nginx服务时,可能会出现以下信息:Address already in use地址已经被使用了。
$ nginx
nginx: [emerg] bind() to 0.0.0.0:8080 failed (48: Address already in use)
nginx: [emerg] bind() to 0.0.0.0:80 failed (48: Address already in use)
此时,您可以kill掉相关端口;也可以修改 nginx端口
- 打开
nginx.conf配置
$ open /usr/local/etc/nginx/nginx.conf
- 修改端口号
 server {
-   listen       8080;
+   listen       8888;
    server_name  localhost;
重启nginx
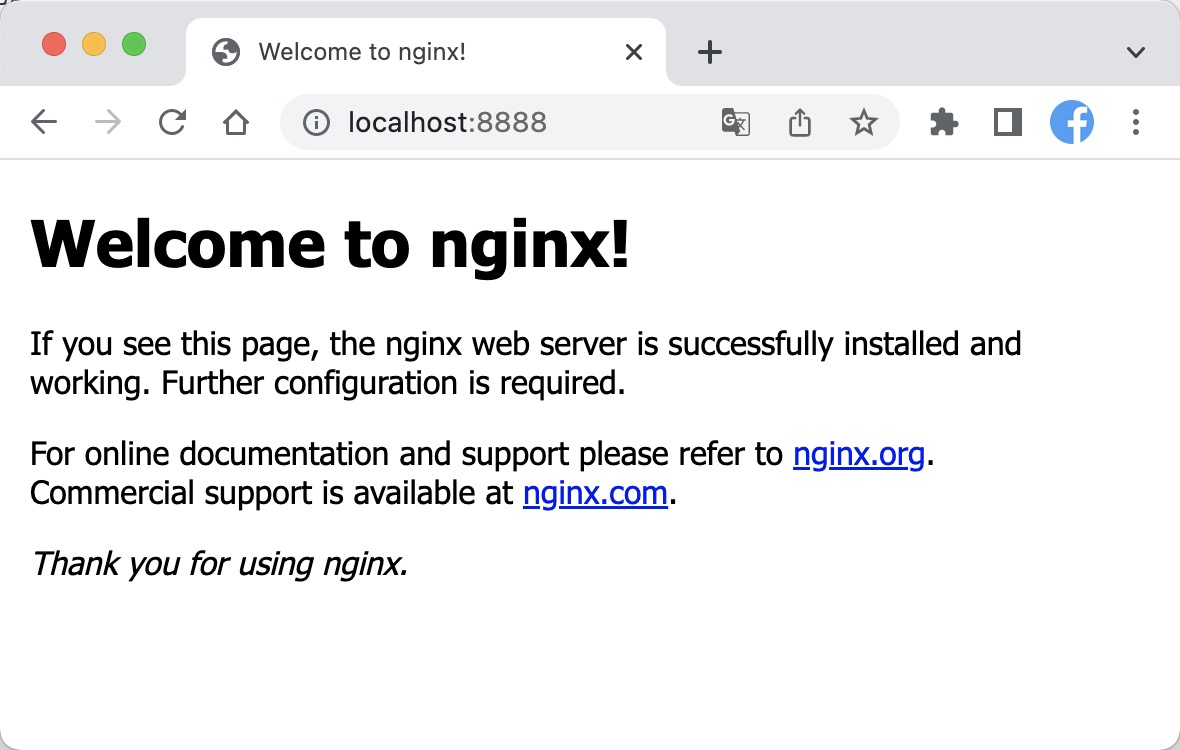
sudo nginx -s reload|reopen|quit此时,可以在浏览器中打开:
http://localhost:8888/,看到下面信息则nginx启动成功
# . 配置 *.conf
在
nginx.conf配置文件中,我们可以看到include servers/*;表示配置从此处引入的。
为方便管理,我们把网站nginx配置的引入指向指定目录:
- include servers/*;
+ include /Users/leon/Home/labs/MNMP/vhost/nginx/*.conf;
下面变来配置一个 plc.conf 的文件。
server
{
    listen 80;
    server_name plc.labs.com;
    index index.php index.html index.htm default.php default.htm default.html;
    root /Users/leon/Home/labs/other/PLC/tp6/public;

    #SSL-START SSL相关配置,请勿删除或修改下一行带注释的404规则
    #error_page 404/404.html;
    #SSL-END

    #ERROR-PAGE-START  错误页配置,可以注释、删除或修改
    #error_page 404 /404.html;
    #error_page 502 /502.html;
    #ERROR-PAGE-END

    #PHP-INFO-START  PHP引用配置,可以注释或修改
    include enable-php-73.conf;
    #PHP-INFO-END

    #REWRITE-START URL重写规则引用,修改后将导致面板设置的伪静态规则失效
    location / {
        if (!-e $request_filename){
            rewrite  ^(.*)$  /index.php?s=$1  last;   break;
        }
    }
    #REWRITE-END

    #禁止访问的文件或目录
    location ~ ^/(\.user.ini|\.htaccess|\.git|\.svn|\.project|LICENSE|README.md)
    {
        return 404;
    }

    #一键申请SSL证书验证目录相关设置
    location ~ \.well-known{
        allow all;
    }

    location ~ .*\.(gif|jpg|jpeg|png|bmp|swf)$
    {
        expires      30d;
        error_log /dev/null;
        access_log /dev/null;
    }

    location ~ .*\.(js|css)?$
    {
        expires      12h;
        error_log /dev/null;
        access_log /dev/null;
    }
    # access_log  /www/wwwlogs/plc.threetowns.cn.log;
    # error_log  /www/wwwlogs/plc.threetowns.cn.error.log;
}
# 2. 配置说明
server_name:定义域名root:定义项目根目录(thinkphp6.x需要指向 public 目录)伪静态规则
location / {
    if (!-e $request_filename){
        rewrite  ^(.*)$  /index.php?s=$1  last;   break;
    }
}
# 3. 重启nginx
# 启动
brew services start nginx

# 停止
sudo brew services stop nginx
# 3. 配置vhost
相关推荐:
- 「已损坏、身份不明的开发者、无法检查是否含恶意软件」解决:点我查看 (opens new window)
- 「不能安装该软件,因为当前无法从软件更新服务器获得」解决:点我查看 (opens new window)
- 应用运行出现「意外退出」及「崩溃闪退」问题修复方法:点我查看 (opens new window)
- macOS 最好的应用深度卸载启动项管理工具下载:点我查看 (opens new window)
- MacOS小助手,常用命令行脚本工具:点我查看 (opens new window)
- 「如何开启任何来源?」解决:点我查看 (opens new window)
- SIP关闭方法:点我查看 (opens new window) M1点我查看 (opens new window)
更多精品Mac软件请访问:https://mac.orsoon.com/
  <Directory />
-    AllowOverride none
-    Require all denied
+    Order deny,allow
+    Allow from all
  </Directory>
修改目标指向
- DocumentRoot "/Applications/XAMPP/xamppfiles/htdocs"
- <Directory "/Applications/XAMPP/xamppfiles/htdocs">

+ DocumentRoot "/Users/leon/Home/labs/MNMP/www"
+ <Directory "/Users/leon/Home/labs/MNMP/www">
← brew node.js常规操作 →